Friday 30 December 2011

Fabric tags


After making a fabric texture tag for a swap, I couldn't stop making them. I thought I would make one in every colour. Here are the first of them. They are on painted pelmet vilene, with bits and pieces sewn on with the machine. The bits consist of fabric, yarns, net, organza, glittery fibres and fabrics, anything that fits the colour and can be sewn down. I embellished with beads at the end, and added cords made on the machine. I also cut out some lutrador shapes on the die cutter, and painted them to match. I put eyelets in some of them.
The next ones ready to be sewn are white, blue and turquoise.

Tuesday 27 December 2011

12 days of Christmas swap.


For the last three years I have been in a swap where we make 12 presents ( all the same) for the other participants. We each receive 12 different ones in return. It's very interesting to see what the others make. This year all the work was brilliant, and there are some really useful things. I made glasses cases, which can also be used as a scissor case.
I felted a piece of calico with wool tops, placed some yarn bits, and shiny fibres, and then covered the whole thing with organza. I then machined over the top with straight and fancy stitches. I zapped the whole thing with the heat gun, and cut it into the required shape. I lined the front and back which is made from patterned fabric, and assembled the whole case.

Monday 19 December 2011

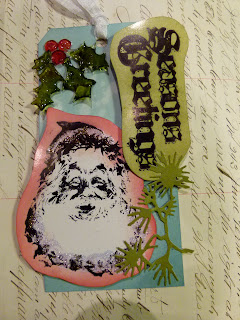
Tim Holtz style Christmas tags Days 11 & 12


Finished at last, but with having a terrible cold caught from my grandson, and then being away for the weekend, I didn't get them on the blog. Not very keen on day 11, but quite enjoyed the shrink plastic, shrunk in the UTEE technique. Mind you, mine are so sharp you could cut yourself on them, and they do look like glass.. Much more fun with day 12, but didn't like Tim's fracture doll, so found an angel to put on instead. In fact all I had for this one, was the dwellings die. The rest was all substituted. Quite pleased with the result on this one, though my tissue flkower has seen better days, I think the moths must have got to it while we were away.

Sunday 11 December 2011

Tim Holtz style Christmas tags Day 10


Again a lot of improvisation on this one, but I did manage to do the fragments. Image transfer on these is not my forte, so I was quite pleased with the results. I used Crafty Individuals images. I substituted Tim's letters with small scrabble pieces and covered them with glossy accents, having inked around the edges with a red ink. I used my real pine cones for the decoration at the bottom. I now need to find a small pine cone bearing pine tree.

Saturday 10 December 2011

Tim Holtz Style Christmas tags Day 9


I didn't have anything for this one, so decided to use the hanging sign die, I was quite pleased with how it turned out, even though it is too big for the tag.

Tim Holtz style Christmas tags Day 8


This is my favourite so far, as I love steampunk. I did have the stamps for this, so it came together quite quickly. Apart from cutting the weathered clock which ruined the last of my grungboard. It didn't want to cut anything, so grungepaper was my best bet. Note to self, must buy myself some grungboard for Xmas. I like the technique of stamping with acrylic paint in white, and then distress inking over the top. I had to use sticker numbers instead of Tim's proper ones, which I have never posessed.

Tim Holtz style Christmas tags Day 6 and 7


I did have the embossing folder for day 6, but didn't really like the colours Tim used. I made two of these, thinking another one would convince me to like it. No it didn't work, but I suppose if it works for some people, then it's OK. I don't think the old coloured metal look is very Christmassy.
Day 7 was much more to my liking, even though I had nothing that Tim used. I like the crumpled glassine paper, but had to cut the leaves by hand. I couldn't rip lace like Tim did either.

Tim Holtz style Christmas tags Day 4 and 5


The technique of using alcohol ink on acetate, and then using archival ink on it and blotting it off, doesn't really work well with me, I had several goes, and this was the best I could do, the rest I had to improvise as I had nothing else. The snowman in the middle is a piece of ribbon. The one with the deer on I did enjoy doing, even though Tim used a snowman. The good old reindeer die came out again, and was covered with crackle paint, then inked over with distress inks. I must buy some sticky backed canvas as it kept coming away from the card background. As I didn't do the same as Tim, I had to improvise once again. All the more challenging I think.

Tim Holtz style Christmas tags Day 2 and 3


Here are day 2 and 3, where the only thing I had was the reindeer die. I did struggle a bit with the canvas not sticking to the card. Perhaps I should buy some of Claudines sticky backed one. Day three I don't like very much, as I didn't have a big enough stamp to cover the tag, and had to make it up with several. I feel it's a bit plain. The technique of making your own stamp pad with the distress reinkers is brilliant. I had to hand cut the holly leaves, as I don't have any of the winter foliage dies.

Friday 9 December 2011

Tim Holtz style Christmas tags


I followed Tim's tags last year, and as they made such a great decoration in the dining room, I am doing them again this year. Once again, i don't have all the dies and stamps, but it's good to be able to find your own way with all his techniques. Here is Day 1, where it was all made without one of his dies.

Wednesday 9 November 2011

Deco pages


I was so behind with the last two deco book swaps I joined, that a weekend without the men around, I gritted my teeth and got them done. One was for Owls and crows, the other was Autumn. They were both for my own books, everyone else had sent theirs to me ages ago. They are now complete, and on the shelf with all my other lovely altered and chunky books. I need a bigger room, well two big rooms would do, one for sewing, and one for everything else.

Mixed media postcards


For a swap for mixed media Autumn colour postcards, I made two. One all fabric, and one on a fabric paper background. I did some felting, and cut the leaves out of the felt and some fabric, with my Tim Holtz mini tattered leaves die. I applied these with a tiny bit of glue, and then used the sewing machine to do the veins etc. I finished them off with some machine embroidery.

A few ATCs for a change


I don't make very many ATCs now, as I have a vast collection of them. One day I will make some fabric covers for the files, but don't hold your breath.
These are for a vintage lady swap, and I can't resist vintage.
I coloured the backgrounds with distress inks, and then stamped and embellished over the top.

Monday 17 October 2011

Felted and embroidered fabric


I thought it was time my embellisher came out of hiding, so set about making some fabric to make things with later. I felted onto pre felt , and then placed layers of organza on top. I then used machine embroidery, and straight stitching to hold it all together. I then heated it with a heat gun to distress the fabric. So far I have made a phone case for a friend, and will make a book cover with the larger piece.

Yet another page


Page 9 was 'Pressed flowers', which didn't really inspire me much. Luckily I had two clay green men pieces, which I worked round. The flowers are real, but the oak leaves are die cuts. The background was made using a Tim Holtz embossing folder. Not one of my best pages.

Saturday 3 September 2011

Page No 8 Polka dots


This page was a bit of a challenge, as dots are not my thing, I'm dotty enough already.
I thought the easiest way out of this one was to dress up an paper art doll with some dotty fabric. I had some dot backgrounds for the front and back, so decided to make it fairly simple.
The face is clay, but the rest is card. The limbs are moveable.

Wednesday 17 August 2011

Another page for the Interpretations book


This time the title is 'ripped', and having found a suitable picture, I knew what I wanted to do. First of all I ripped up some paper for the front and back backgrounds. I stuck the main photograph on, and them ripped the man's photo in half. The caption says ' As soon as I knew, I just ripped his photograph in two'
I made some flowers out of organza, and added some lace at the bottom

Monday 8 August 2011

Fabric postcards Trees


These are some fabric postcards for a swap I am hosting. The backgrounds are painted pelmet vilene, and the tree trunks cut out with the Tim Holtz tree die on black felt. I free machine embroidered on the black felt. The leaves on the green one are bits of silk cut up and sewn down with free embroidery. The orange one is made up of bits of cut up yarns, again with machine embroidery on top.

Monday 25 July 2011

The next page--Stained for life


For this topic I chose stained glass windows. The front window was made from some acrylic packaging, I drew a window with pearl pens, which give a raised line.. Inside these lines I used alcohol inks for the coloured glass.. This window swings to the side, and underneath there is an explanation of stained glass.
On the back of this page is a fabric pocket with tags with examples of stained glass windows. I also stamped a window on inked paper, and embossed it. It is now on it's way to Canada.

Friday 8 July 2011

Chunky elephant book


I love elephants, my mother collected them, and as I inherited them, they are now all over the house. Stone, pottery, metal, alabaster from Italy, volcanic ash ( I bought that one from Etna), glass, crystal,, and loads of wooden ones. I am now adding to them by making books with them in. (no not the ornaments)
These are for a swap for a chunky book. As I have already done an altered book, I thought this would be a doddle. I have lost my way a bit, and found them a chore. It will be interesting to see what I get back. They are a mixture of collage, stamping, friendly plastic, and fibres.

Mixed media birds


Not quite back into the swing of things, but did manage to do a few swaps recently that took a bit of time. The template for these was a Stampington one, and I hope I have managed to do the right size. They flew off across the Atlantic yesterday, so I will find out soon enough.
They are a mixture of collage and stamping.

Blog Archive